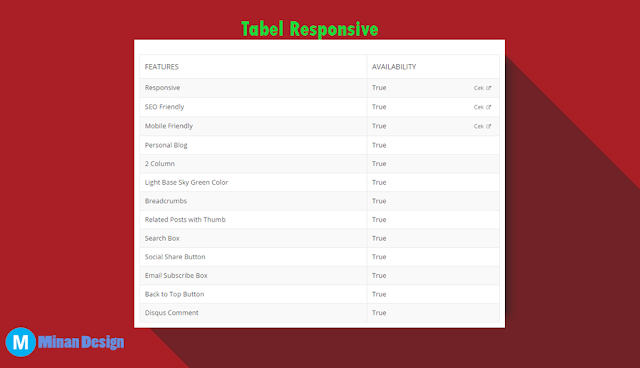
Tutorial Membuat Tabel Responsive diBlog - Sobat pasti sudah tahu membuat tabel didalam blog, tapi tutorial kali ini berbeda. Dalam tutorial kali ini tabel yang akan kita buat didalam Blog jauh lebih ringan dan bagus, karena menggunakan CSS untuk kalian yang suka berbagi tempate dan memberikan informasi didalam datel tersebut.
Bagi sobat yang ingin membuat tabel tersebut ikuti langkah dibawah ini.
Langkah Membuat Tabel Responsive diBlog
1. Masuk ke Blogger > Klik Template > Klik Edit HTML
2. Masukkan kode CSS dibawah ini diatas kode ]]></b:skin> atau </style>
/* CSS Post Table Minan Design */
.post-body table td,.post-body table caption{border:1px solid #e9e9e9;padding:5px 10px;text-align:left;vertical-align:top;}
.post-body table th {border:1px solid #e9e9e9;padding:10px;text-align:left;vertical-align:top;}
.post-body table.tr-caption-container {border:1px solid #e9e9e9;}
.post-body table caption{border:none;font-style:italic;}
.post-body table{}
.post-body td, .post-body th{vertical-align:top;text-align:left;font-size:13px;padding:3px 5px;}
.post-body table tr:nth-child(even) &gt; td {background-color:#f9f9f9;}
.post-body table tr:nth-child(even) &gt; td:hover {background-color:#fbfbfb;}
.post-body th{background:#fff;font-weight:400;text-transform:uppercase;font-size:14px}
.post-body th:hover{background:#fdfdfd;}
.post-body td a{color:#768187;padding:0 6px;font-size:85%;float:right;display:inline-block;border-radius:3px}
.post-body td a:hover {color:#7f9bdf;border-color:#adbce0;}
.post-body td a[target=&quot;_blank&quot;]:after {margin-left:5px;}
.post-body table.tr-caption-container td {border:none;padding:8px;}
.post-body table.tr-caption-container, .post-body table.tr-caption-container img, .post-body img {max-width:100%;height:auto;}
.post-body td.tr-caption {font-size:80%;padding:0px 8px 8px !important;}
.post-body li {list-style-type:square;}
img {max-width:100%;height:auto;border:none;}
table {max-width:100%;width:100%;margin:1.5em auto;}
table.section-columns td.first.columns-cell{border-left:none}
table.section-columns{border:none;table-layout:fixed;width:100%;position:relative}
table.columns-2 td.columns-cell{width:50%}
table.columns-3 td.columns-cell{width:33.33%}
table.columns-4 td.columns-cell{width:25%}
table.section-columns td.columns-cell{vertical-align:top}
table.tr-caption-container{padding:4px;margin-bottom:.5em}
td.tr-caption{font-size:80%}
.widget ul {padding:0;}3. SAVE terlebih dahulu templatenya.
4. Buat postingan baru untuk meletakkan tabel tersebut. Masukkan kode dibawah ini kedalam HTML, Jangan COMPOSE
<table cellpadding="0" cellspacing="0" style="text-align: left;"><tbody>
<tr> <th>Features</th>             <th>Availability</th>         </tr>
<tr> <td>Responsive</td>             <td>True <a href="http://www.responsinator.com/?url=http%3A%2F%2Fminanseo.blogspot.com%2F" rel="nofollow" target="_blank">Cek</a></td>         </tr>
<tr> <td>SEO Friendly</td>             <td>True <a href="http://chkme.com/seo-minanseo.blogspot.com" rel="nofollow" target="_blank">Cek</a></td>         </tr>
<tr> <td>Mobile Friendly</td>             <td>True <a href="https://www.google.com/webmasters/tools/mobile-friendly/?url=http%3A%2F%2Fminanseo.blogspot.com%2F" rel="nofollow" target="_blank">Cek</a></td>         </tr>
<tr> <td>Personal Blog</td>             <td>True</td>         </tr>
<tr> <td>2 Column</td>             <td>True</td>         </tr>
<tr> <td>Light Base Sky Green Color</td>             <td>True</td>         </tr>
<tr> <td>Breadcrumbs</td>             <td>True</td>         </tr>
<tr> <td>Related Posts with Thumb</td>             <td>True</td>         </tr>
<tr> <td>Search Box</td>             <td>True</td>         </tr>
<tr> <td>Social Share Button</td>             <td>True</td>         </tr>
<tr> <td>Email Subscribe Box</td>             <td>True</td>         </tr>
<tr> <td>Back to Top Button</td>             <td>True</td>         </tr>
<tr><td>Disqus Comment</td>             <td>True</td>         </tr>
</tbody></table>
Rubah isi dari tabel tersebut sesuai yang di inginkan dan dibutuhkan.
5. Publikasikan. Dan lihat hasilnya.
Berikut DEMOnya:
Sekian untuk Tutorial Membuat Tabel Responsive diBlog. Terimakasih


0 comments: